


One of the best ways to fast track your report building is to have your own PowerPoint templates replicated in Displayr. In this way, as you build your analysis it will already be “on-brand” and there will be minimal work to do when you export to PowerPoint, if any at all.
The good news is this can be done in a few simple steps (there is a video of these steps in action below).
1: Have a document with your PowerPoint template ready.
This will typically be in Standard (4:3 or A4) or Widescreen (16:9) format. Decide what format your new Displayr template is to be in.
2: Open a blank Displayr document
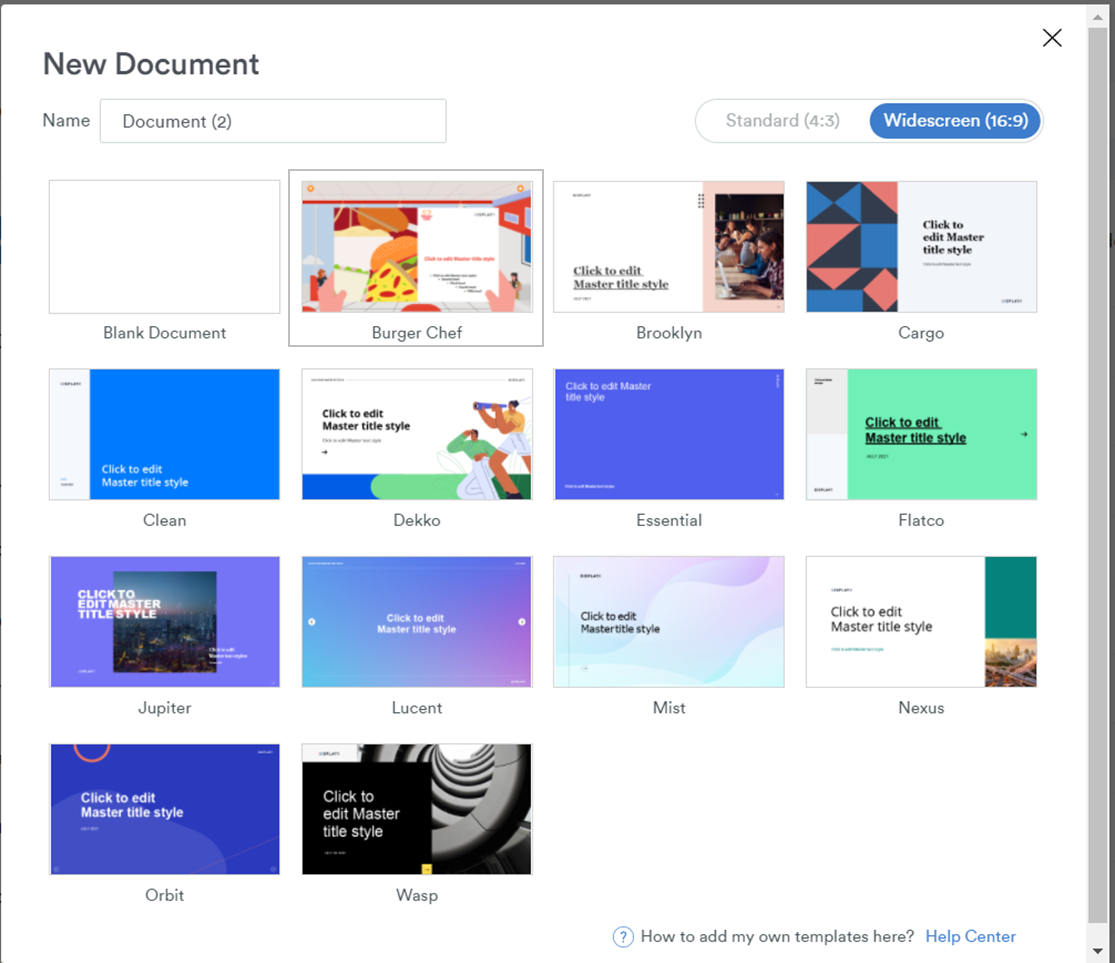
From the Document page, select +New Document, check that the tab at the top is set to your desired format, then select ’Blank’
3: Go to the Page Master and edit the Displayr defaults
In addition to a “Blank” page (which requires no editing), there are default layouts for Title Only, Title Page, and Title and various Content Layouts.
This is the key step – you basically need to change the titles, text box formats and default chart colors to reflect your PowerPoint template and paste in any graphical elements from PowerPoint.
You can duplicate and edit any of these pages if you want to add more master pages.
4: Save your template using the required file naming conversion and download a QPack.
Publish > Export Data > Download Document (*.QPack)
Name the *.QPack as per these conventions (this is required for it to be read in when uploaded, in Step 6).
- Widescreen templates: [Template Name].widescreen.template
- Standard templates: [Template Name].template
Be case specific for the "widescreen" and "template" terms
5: Create thumbnail images of some of the key pages (optional)
This step enables you to see a preview of your template in the gallery when creating a new document, so it’s worth doing. These are also used in Step 6.
The file-naming convention for the first image to show in the gallery is:
- Widescreen templates: [Template Name] 1.widescreen.template.png
- Standard templates: [Template Name] 1.template.png
For second and subsequent images, replace the “1”, with 2, 3, etc. Note, apart tom the name text before the number, these terms are case sensitive and there must be a space between the template name and the number.
6: Upload the template *.QPack and related *.png files to your Displayr Cloud Drive
The Displayr Cloud Drive is accessed via the Icon at the top right of screen: ![]()
Shortly after this step you will see your own template available from the gallery of options when you create a new document (as per the “Burger Chef” example here).
The steps in action
This video works through the key steps.
Anyone with basic PowerPoint skills can easily set their own corporate or client templates up in Displayr. Once done, your analysis and report build can always be “on-brand”, saving you time and producing better looking reports